Choosing the right downlight angle can change a room’s atmosphere, comfort, and visual balance. A narrow beam may highlight artwork sharply, while a wider beam can soften a dining area or hallway. The challenge is not simply turning the fitting. It involves ceiling height, beam spread, glare, surface texture, and the object being illuminated.
Lighting designer Randall Whitehead often emphasizes that “Good lighting is not about the fixture; it is about what the light reveals.” This principle guides the question, “How to adjust the angle of adjustable downlights,” especially in homes, galleries, retail spaces, and hospitality interiors. The best adjustment usually begins with the light switched on. Move the fitting slowly. Watch where the brightest part lands. A few degrees can change the entire composition.
Do not aim every downlight directly at the floor. That approach may create flat lighting and uncomfortable glare. Instead, tilt the fixture toward artwork, work surfaces, architectural textures, or circulation paths. Keep the beam controlled. Check reflections on glossy cabinets and television screens. They often expose mistakes quickly.
Experience also teaches restraint. I have seen beautifully installed downlights adjusted too aggressively, leaving dark ceiling patches and uneven walls. Sometimes, the original angle is almost right. That is easy to overlook. Test the room at night, then reassess it during daylight. Use a ladder safely, follow the manufacturer’s adjustment limits, and avoid forcing the trim or internal mechanism. Small changes, tested patiently, usually produce the most convincing result.
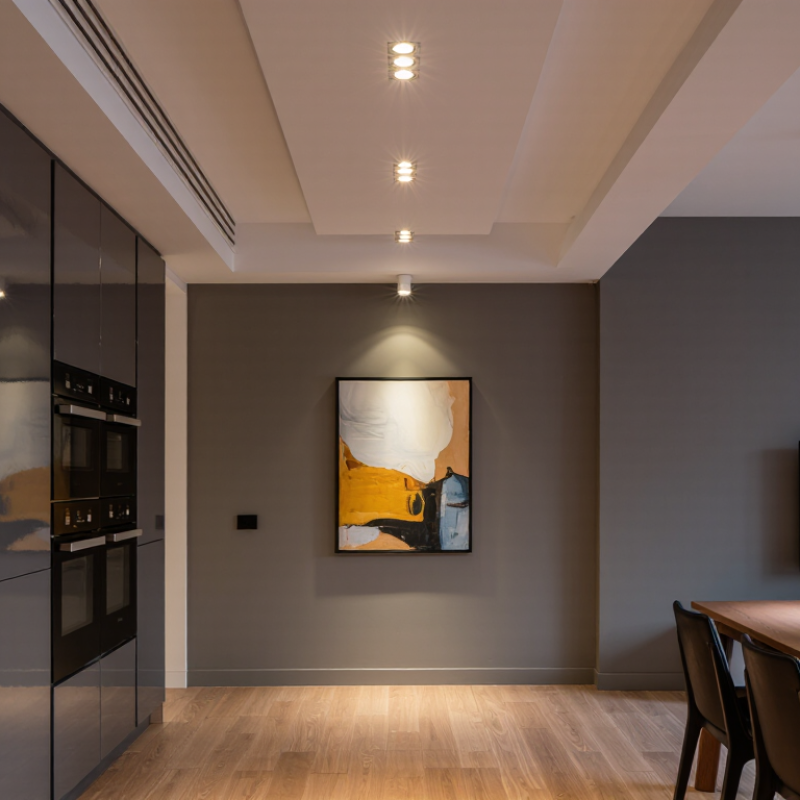
The ideal downlight angle depends on the task, not simply the ceiling height. For reading or desk work, aim the beam toward the working zone at roughly 30–35 degrees from vertical. This reduces shadows from the head and hands. EN 12464-1:2021 commonly specifies 500 lux for reading and writing areas, so angle alone cannot deliver good performance. Output, spacing, and surface reflectance matter too.
For general circulation, a 40–60-degree beam can spread light across floors and reduce bright spots. A narrower 15–25-degree beam suits artwork, display shelves, or textured walls. Position the fitting about 30–45 centimeters from a wall, then tilt it toward the visual target. CIE 117:1995 and the IES Lighting Handbook both emphasize glare control, luminance balance, and viewing direction. A bright ceiling spot may look impressive, yet still create discomfort.
I usually test the angle at night, using a sample fitting and masking tape on the floor. Small changes are visible. A 5-degree adjustment can move the highlight away from a picture frame. It can also expose an unwanted shadow. A 30-degree angle is not magic. Furniture, ceiling height, and viewer position may demand revision. Measure the task surface, check reflections, and adjust after installation rather than trusting a drawing completely.
Start with the ceiling. Gypsum ceilings usually allow recessed adjustable fixtures, while concrete ceilings require surface-mounted or shallow housings. Suspended ceilings need stronger support and enough plenum clearance. Check fire ratings, insulation contact, and service access before changing the angle. A beautiful beam is useless if the housing overheats.
Fixture design sets the practical limit. Fixed downlights cannot redirect light. Gimbal fixtures commonly provide about 15–30 degrees of tilt, while architectural adjustable fittings may reach 40 degrees or more. Confirm the manufacturer’s photometric file, not only the product label. A stated “30-degree adjustment” may describe the mechanism, not the useful beam direction.
Measure the target from the ceiling opening. For a 2.4-meter ceiling and artwork centered at 1.5 meters, a one-meter horizontal offset needs roughly 42 degrees from vertical. That exceeds many residential gimbals. Move the fixture closer, choose a wider beam, or accept softer illumination.
IEA’s Lighting 2022 analysis estimates that lighting uses about 15% of global electricity, so wasted spill deserves attention. The U.S. Department of Energy’s 2023 solid-state lighting report also identifies optical control and glare reduction as continuing design priorities. CIE 117 provides a recognized method for evaluating discomfort glare.
I still see installations aimed directly at eye level. That is a mistake. I have also found that perfectly centered beams can feel cold, especially on textured walls. Field testing should include a chair, a doorway, and evening viewing. The first setting is rarely perfect.
What Is the Best Way to Adjust Downlight Angles?
Set the Beam Direction Using Reference Points and Measured Distances
Accurate downlight aiming begins with fixed reference points, not visual guesswork. Mark the wall, artwork center, or countertop edge before adjusting the fitting. Measure the distance from each downlight to its target, then record the intended beam direction. A simple floor plan can prevent uneven spacing and accidental over-lighting.
Stand directly beneath the light and project an imaginary line toward the reference point. Adjust the tilt gradually, checking where the beam center lands. For wall lighting, aim slightly above the visual center to reduce harsh shadows. For a kitchen surface, align the beam with the main working area rather than the room’s geometric center. Measure twice.
I have found that small changes create noticeable differences, especially on textured walls. One degree can move the brightest area several centimeters. Use a tape measure or laser distance tool to compare the beam position with your marks. Switch off the power before touching any accessible electrical parts, and ask a qualified electrician when the fitting requires wiring work.
Do not rely only on a perfectly symmetrical appearance. Furniture may shift, artwork may be rehung, and my original measurements may be wrong. Check the room from normal standing height after adjustment. That final viewpoint often reveals glare, dark corners, or a beam that looked correct only from below.
Adjusting downlight angles is a practical way to control glare, shadows, and uneven brightness. Start by aiming the beam at the working surface, not directly at eye level. In offices, EN 12464-1 recommends about 500 lux for routine work and a Unified Glare Rating of 19 or lower. These targets matter because excessive contrast can cause discomfort, even when average illuminance looks acceptable. The CIE 117 glare method also shows why fixture position, background brightness, and observer direction must be assessed together.
A 20–30-degree tilt often highlights a wall, artwork, or task area without creating a harsh bright spot. Keep the beam away from glossy screens and polished desks. Overlapping adjacent beams slightly can soften dark gaps between pools of light. However, too much overlap wastes energy and may flatten the room. I still find that a perfectly symmetrical layout can feel visually dull. Human movement changes the result.
Tips: Test one row at a time. Use a light meter at desk height. Check the space from seated and standing positions. Move the angle by five degrees, then reassess shadows on faces, shelves, and floors. Record the setting before adjusting the next fixture. The U.S. Department of Energy’s solid-state lighting guidance emphasizes application quality, not efficiency alone. That is easy to forget. A lower-glare installation may need slightly more fixtures, but it can provide better visual comfort and fewer distracting reflections.
Practical adjustment guidance for aiming adjustable downlights according to room use, mounting height, beam spread, and visual comfort.
| Lighting Objective | Recommended Starting Angle | How to Aim the Downlight | Suitable Beam Spread | Common Problem if Misadjusted | Fine-Tuning Tip |
|---|---|---|---|---|---|
| General ambient lighting | 0°–15° from vertical | Aim mostly downward so the light overlaps evenly with neighboring fixtures. | Wide beam, approximately 50°–90° | Bright spots directly below the fixtures and darker gaps between them. | Adjust neighboring fixtures in small increments until the floor or work plane appears consistent. |
| Wall washing | 20°–35° toward the wall | Direct the beam toward the upper wall area while keeping the beam centered on the surface. | Wide or asymmetric beam | Uneven vertical brightness, scalloped patterns, or excessive light near the ceiling. | Keep fixture spacing and wall offset consistent; check the wall from the normal viewing position. |
| Artwork or display accent lighting | 25°–35° toward the display | Aim across the viewing area rather than directly into the viewer’s eye line. | Medium beam, approximately 20°–40° | Reflections on glass, harsh highlights, or distracting glare for viewers. | Move the beam slightly off-axis and use a narrower beam only when the display requires precise emphasis. |
| Kitchen countertop lighting | 10°–25° toward the work surface | Position the beam in front of the user’s working area to reduce shadows cast by the body. | Medium to wide beam, approximately 35°–60° | Dark work areas caused by the user’s own shadow or glare from glossy surfaces. | Test the light while standing at the counter; shift the aim until hands and preparation areas are clearly illuminated. |
| Desk or reading area | 10°–20° toward the task | Aim beside or slightly in front of the user, avoiding a direct line into the eyes. | Medium beam, approximately 30°–50° | Eye fatigue, reflected glare on screens, or a strong shadow from the head and hands. | Use a dimmer where available and compare the lighting with the screen switched on and off. |
| Corridor and circulation area | 0°–10° from vertical | Keep the beam centered along the path of travel for a calm and predictable light pattern. | Wide beam, approximately 60°–90° | Alternating bright and dark zones that make the corridor feel visually uneven. | Prioritize overlap between adjacent beams instead of aiming every fixture at the centerline. |
| Bathroom mirror lighting | 15°–30° toward the face area | Aim to illuminate the face without directing the beam into the mirror at a reflective angle. | Wide or medium beam, approximately 40°–70° | Facial shadows under the eyes and chin, or uncomfortable reflections in the mirror. | Combine with vertical side lighting when possible; adjust while standing at the mirror. |
| High ceiling or double-height space | 0°–20° from vertical | Use a controlled downward aim that reaches the occupied area without creating excessive contrast. | Medium beam, approximately 30°–60° | Insufficient light at floor level or concentrated pools of brightness. | Confirm the beam footprint at the actual mounting height; a higher ceiling may require a wider or more powerful distribution. |
| Reducing direct glare | 5°–20° away from the main viewing direction | Rotate the fixture away from typical eye positions, seating areas, and reflective surfaces. | Controlled medium beam | High-angle brightness visible in the field of view, especially from sofas, beds, or desks. | View the fixture from seated and standing positions; adjust until the light source is no longer visually dominant. |
| Reducing harsh shadows | 10°–25° toward the shadowed side | Shift the beam to fill the darker region instead of aiming only at the center of the object. | Wide or overlapping medium beams | Strong shadows behind people, cabinets, shelves, or furniture. | Use overlapping light from more than one direction when a single downlight cannot fill the shadow area. |
The best downlight angle is not decided under one lighting condition. Daylight can hide uneven beams, glare, and dark corners. Test the final arrangement in the actual room, not only on a drawing. I usually switch off the artificial lights at midday and observe how sunlight shapes the walls, floor, and furniture. Then I turn on each downlight and check whether its beam supports the room’s use. A reading chair may need a gentle wall wash, while a work surface needs clearer illumination.
Watch the shadows. At night, close curtains and repeat the test from several viewpoints. Stand near the entrance, sit on the sofa, and walk beneath the fittings. A beam that looks comfortable from below may glare into someone’s eyes across the room. Adjust the angle in small increments, often five degrees at a time. Check reflections on glossy tables, mirrors, screens, and polished floors. The room changes.
Use a light meter when possible, but do not trust measurements alone. Record readings at the main task areas and compare them with visual comfort. I once accepted a balanced daytime layout that felt harsh after dark. The central fitting was technically bright enough, yet it created a distracting patch on the floor. Moving it slightly improved the atmosphere, though one corner became less even. That compromise was acceptable for the room’s purpose. Leave the installation overnight and review it again the next morning. Natural light exposes mistakes that evening testing can miss.
Aim the beam toward the work area at roughly 30–35 degrees from vertical. This can reduce shadows from your head and hands. The angle alone is insufficient. Output, spacing, and surface reflectance also affect comfort.
A 40–60-degree beam spreads light across floors and reduces harsh bright spots. Check the route from the doorway to the seating area. A wider spread may feel calmer.
Use a narrower 15–25-degree beam for artwork, shelves, or textured surfaces. Place the fitting about 30–45 centimeters from the wall. Then tilt it toward the visual target. A perfectly centered beam can still look cold.
Use a sample fitting and masking tape on the floor. Test the arrangement at night, when glare and shadows become clearer. Move the angle in five-degree steps. Small changes matter.
Gypsum ceilings often suit recessed adjustable fixtures. Concrete ceilings may need surface-mounted or shallow housings. Suspended ceilings require firm support and enough ceiling void space. Check heat clearance, fire performance, and service access before installation.
Fixed fittings cannot redirect their beams. Common adjustable fittings may tilt about 15–30 degrees. Some architectural fittings reach 40 degrees or more. Check the actual photometric data, not just the adjustment label.
Measure the horizontal offset between the ceiling opening and the target. For example, a 2.4-meter ceiling and a 1.5-meter artwork center may need about 42 degrees. That exceeds many small adjustable fittings. Move the fitting closer or choose a wider beam.
Yes. Daylight can hide uneven beams, glare, and dark corners. At night, close the curtains and view the room from several positions. Stand near the entrance, sit on the sofa, and walk underneath. The first setting is rarely perfect.
Inspect glossy tables, mirrors, screens, polished floors, and nearby walls. A beam may look comfortable below the fitting but glare across the room. Use a light meter when possible, but compare readings with visual comfort. I once accepted an even layout that felt harsh after dark.
Adjusting downlight angles begins with identifying the lighting task, such as highlighting artwork, illuminating a work surface, or creating balanced general lighting. The ideal angle should direct light where it is needed without causing harsh glare or distracting shadows. Before making adjustments, check the ceiling type, fixture design, and the available range of movement to ensure the downlight can be positioned safely and effectively. Understanding how to adjust the angle of adjustable downlights also requires using reference points, measured distances, and the room’s layout to set a consistent beam direction.
After the initial positioning, fine-tune the light spread by observing brightness levels across walls, floors, and key surfaces. Small angle changes can improve visual comfort, reduce dark spots, and create more even illumination. Finally, test the arrangement during both daytime and nighttime conditions, since natural light can change how the beam appears. This final review helps confirm that the downlights provide the intended atmosphere and practical lighting performance throughout the day.

Diva Lights